Build a Link in Bio Page with HTML and CSS

Build your own Linktree-style link in bio page with HTML and CSS, then put it live. Sixteen short lessons covering layout, styling, and responsive design.

16 lessonsAbout 46 minFree, no account needed

What you learn

  • CSS flexbox layout
  • Styling links and buttons
  • Responsive design basics

Lesson 2 of 16 · 3 min

Set up your Links in Bio project

Set up a fresh project in StackBlitz, the same way as Day 1:

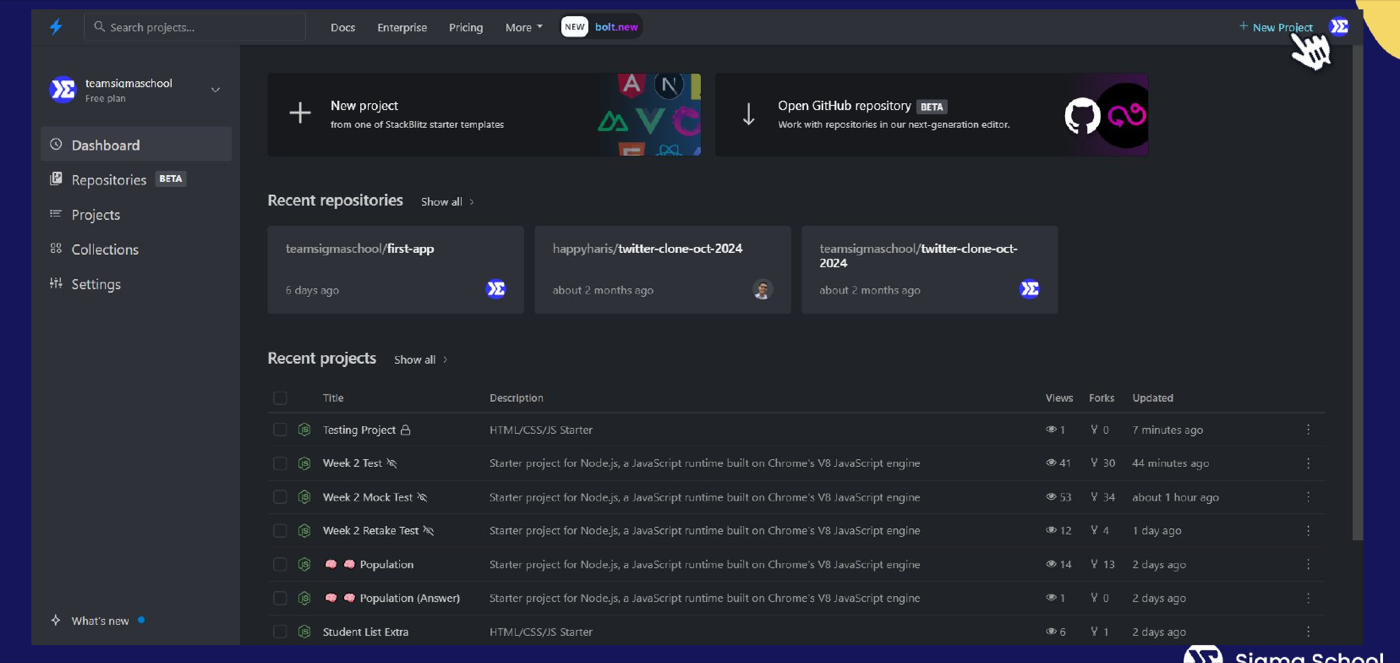
  1. Click the New Project button.

The StackBlitz dashboard with the New Project button

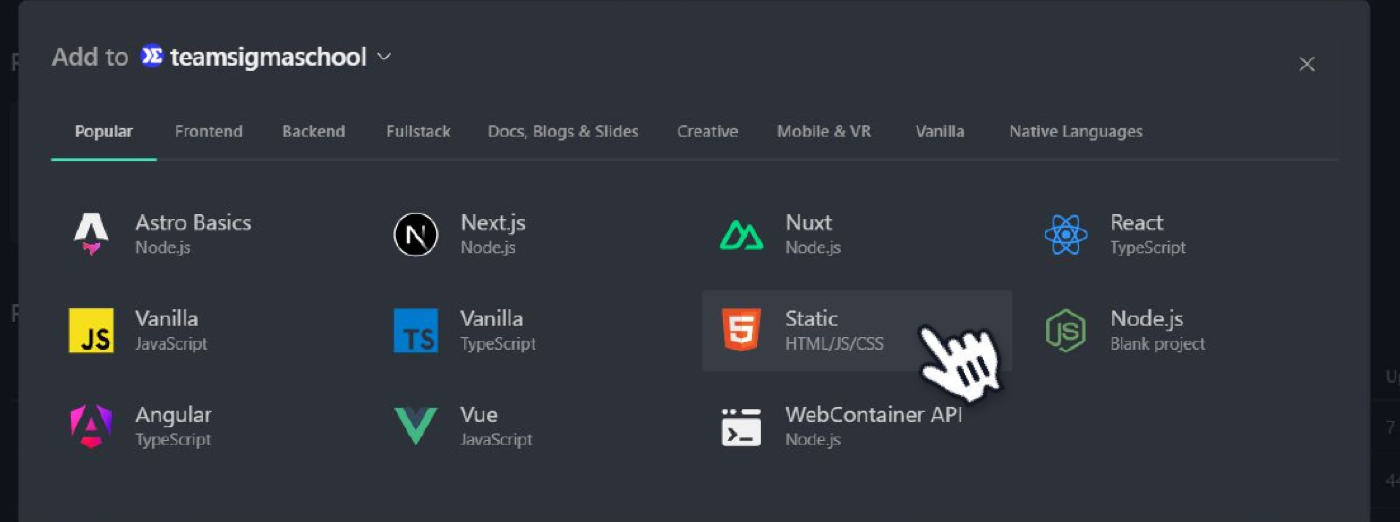
  1. Choose the Static (HTML, CSS, JS) project.

Choosing the Static HTML, CSS, JS template

  1. Rename it Links in Bio.

Renaming the project to Links in Bio

Then clear out what we do not need today:

  • Delete script.js (JavaScript is taught on Day 3).
  • Delete page2.html (we will not use it).
  • Delete the code inside styles.css, we are writing our own from scratch.

You should be left with index.html and an empty styles.css.

This lesson has a task checklist in the portal, where you tick off each step and get feedback on the code you write. Do this lesson free.

Lesson 3 of 16 · 3 min

Add your name

Open index.html and set it up like this. Change "Haris Samingan" to your own name, then save.

<!DOCTYPE html>
<html lang="en">
  <head>
    <meta charset="UTF-8" />
    <meta name="viewport" content="width=device-width" />
    <title>Haris Samingan</title>
    <link rel="stylesheet" href="styles.css" />
  </head>
  <body>
    <h1>Haris Samingan</h1>
  </body>
</html>

Notice the <link> line in the head. That is what connects your styles to this page. Next we will make that text look good.

This lesson has 1 quiz in the portal, where you tick off each step and get feedback on the code you write. Do this lesson free.

Lesson 4 of 16 · 3 min

Style your first text

Now for your first CSS. Go to styles.css, add this, and save:

h1 {
  font-family: Arial, Helvetica, sans-serif;
}

🎉 Congrats! You just styled some text! Your name now uses the Arial font.

💡 Developer Tip

Tired of typing whole values?

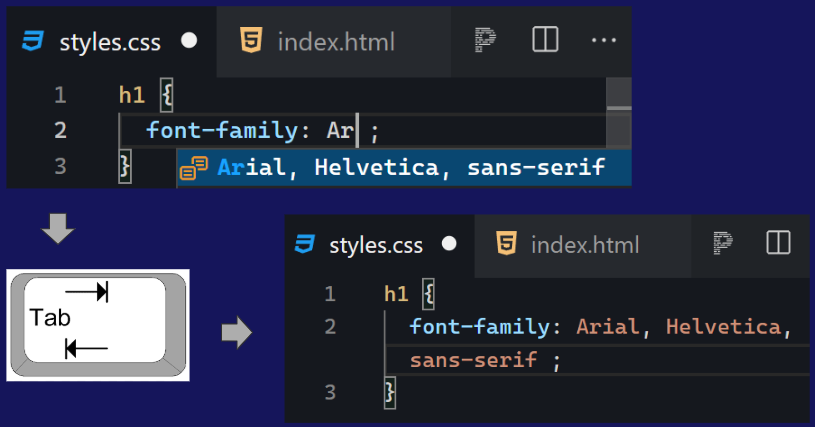
  • StackBlitz has autocomplete.
  • As you type font-family, a suggestion box appears.
  • Use the arrow keys to pick one, then press Tab to complete it.

Tab shortcut to autocomplete font families

Want to experiment? Try other font families:

  • Verdana, Geneva, sans-serif
  • Times New Roman, Times, serif
  • Georgia, serif
  • Courier New, Courier, monospace

This lesson has 1 quiz in the portal, where you tick off each step and get feedback on the code you write. Do this lesson free.

Lesson 5 of 16 · 2 min

What is CSS?

CSS stands for Cascading Style Sheet. It is the way we describe how a website is presented and styled.

We put our styling in a .css file. Naming it styles.css is a convention, a standard practice, not a rule.

If HTML is the structure of your page (the bones), CSS is the look and feel (the clothes and colours).

This lesson has 1 quiz in the portal, where you tick off each step and get feedback on the code you write. Do this lesson free.

Lesson 6 of 16 · 3 min

How CSS connects to HTML

A .css file does nothing on its own.

<head>
  <meta charset="UTF-8" />
  <meta name="viewport" content="width=device-width" />
  <title>Haris Samingan</title>
  <link rel="stylesheet" href="styles.css" />
</head>

We connect it to the page with the <link> tag in the <head>:

<link rel="stylesheet" href="styles.css" />
  • <link> defines a hyperlink to an external file, for example, styles.css.
  • href="styles.css" is the location of the file.
  • rel="stylesheet" describes the relationship: this linked file is a stylesheet.

While we are in the head, two <meta> tags carry useful information about the page:

<meta charset="UTF-8" />
<meta name="viewport" content="width=device-width" />
  • charset="UTF-8" lets the page show letters and symbols from any language, including emojis. 🎉
  • name="viewport" content="width=device-width" sets the page width to match the device's screen, so it looks right on phones.

This lesson has 1 quiz in the portal, where you tick off each step and get feedback on the code you write. Do this lesson free.

Lesson 7 of 16 · 3 min

Read a CSS rule

Quick vocabulary: a visible thing on the page (like a heading) is an element. The code that creates it (like <h1>) is a tag.

Every CSS rule has the same four parts. Take the rule you just wrote:

h1 {
  font-family: Arial;
}
  • h1 is the selector: which element to style.
  • { } the curly brackets hold the declaration.
  • font-family is the property, followed by a colon :.
  • Arial is the value, ending with a semicolon ;.

Read it as: "for every h1, set the font-family to Arial." Once you can read one rule, you can read them all.

This lesson has 1 quiz in the portal, where you tick off each step and get feedback on the code you write. Do this lesson free.

Lesson 8 of 16 · 3 min

Add your profile photo

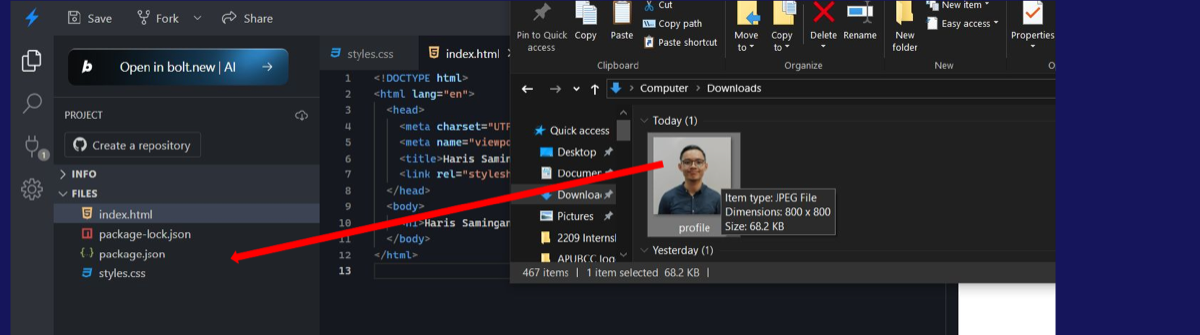
Time to add your face. Drag a square image into the project and name it profile, for example profile.jpeg.

Dragging a square image into the project and naming it profile

The file type can be jpg, jpeg, webp, or png.

  • Place the image in the same folder as index.html.
  • Make src match the full file name. For example, use src="profile.png" for profile.png.

Now show it on the page. In index.html, add an <img> tag inside the body, above your name:

<body>
  <img src="profile.jpeg" height="200" alt="My profile photo" />
  <h1>Haris Samingan</h1>
</body>

Replace Haris Samingan with your own name. Keep the image file name in src exactly the same as the file in your project.

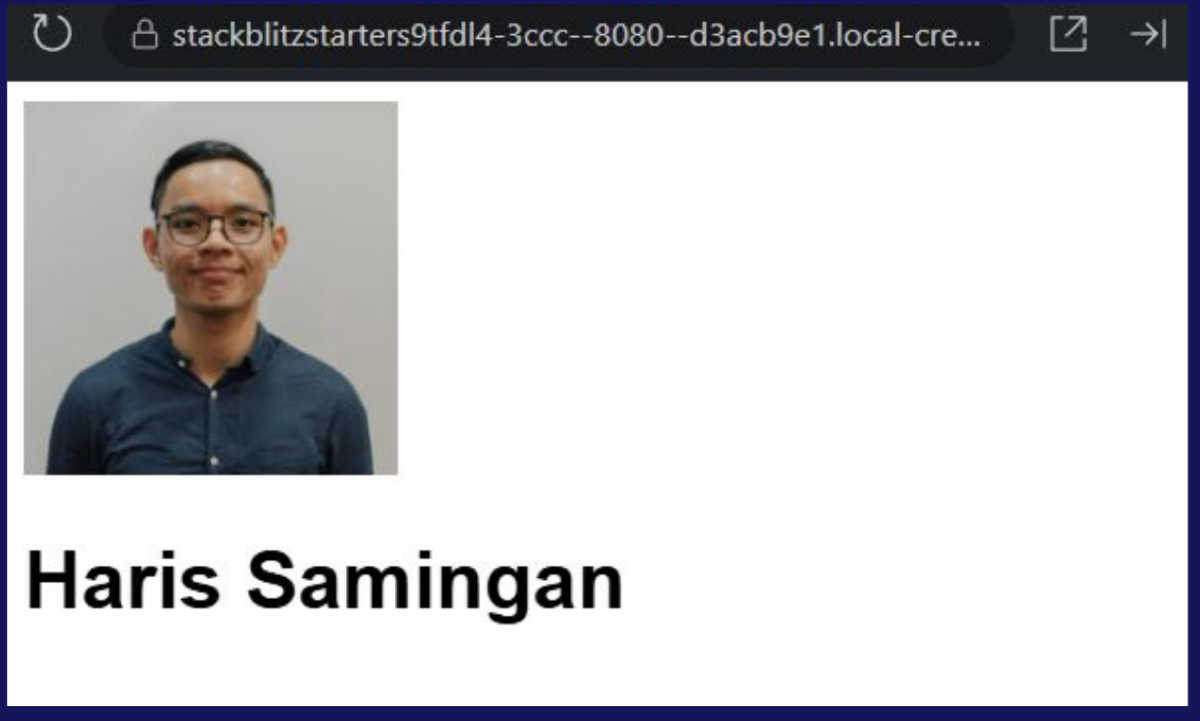
Your project should now look like this:

The page with your profile photo above your name

This lesson has a task checklist in the portal, where you tick off each step and get feedback on the code you write. Do this lesson free.

Lesson 9 of 16 · 3 min

The image tag

The <img> tag shows a photo. It has three useful attributes:

<img src="profile.jpeg" alt="Portrait of Haris" height="150px" />
  • src is the file path to the image.
  • height controls how tall the image is, in pixels (px).
  • alt is the alternate text, shown if the image cannot load. It also lets screen readers describe your image to visually impaired visitors.

src must point to the image's location:

Same folder
my-project/
├── index.html
└── profile.jpeg

Images folder
my-project/
├── index.html
└── images/
   └── profile.jpeg
<!-- The image is beside index.html. -->
<img src="profile.jpeg" alt="My profile photo" />

<!-- The image is inside an images folder. -->
<img src="images/profile.jpeg" alt="My profile photo" />
  • Match the folder, file name, and extension exactly.
  • profile.png and profile.jpeg are different names.
  • Capital letters can matter after publishing, so follow requested names exactly.

Want to see the alt text in action? Temporarily remove the file name from src and run the code, the alt text appears instead of the image. Then add the file name back to bring your photo back.

This lesson has 1 quiz in the portal, where you tick off each step and get feedback on the code you write. Do this lesson free.

Lesson 10 of 16 · 3 min

Make the photo a circle

A square photo looks fine, but a circle looks polished. Go to styles.css, add this, and run the code:

img {
  border-radius: 50%;
}

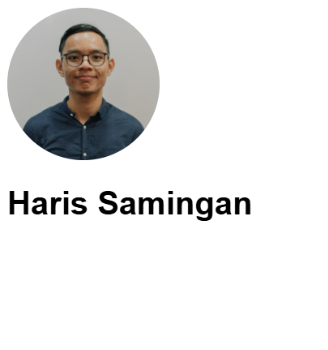
The profile photo rounded into a circle

Good work, you made an image a circle!

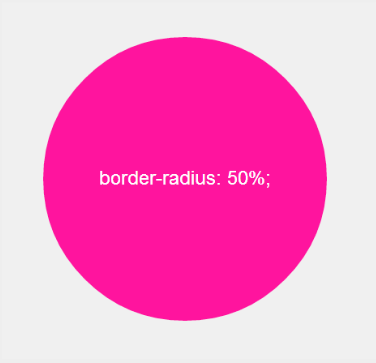
border-radius rounds the corners of an element. 50% rounds them by half the element's width and height, which turns an equal-sided square into a perfect circle. Try other percentages to see what happens.

Making a perfect circle with 50% border radius

This lesson has 1 quiz in the portal, where you tick off each step and get feedback on the code you write. Do this lesson free.

Lesson 11 of 16 · 2 min

Add a tagline

Let's add a short line under your name. In index.html, add a paragraph below your <h1>:

<h1>Haris Samingan</h1>
<p>Graduated from Sigmaschool 🎉</p>

Tagline with paragraph text


Make it yours: your current focus, a fun fact, or what you are learning.

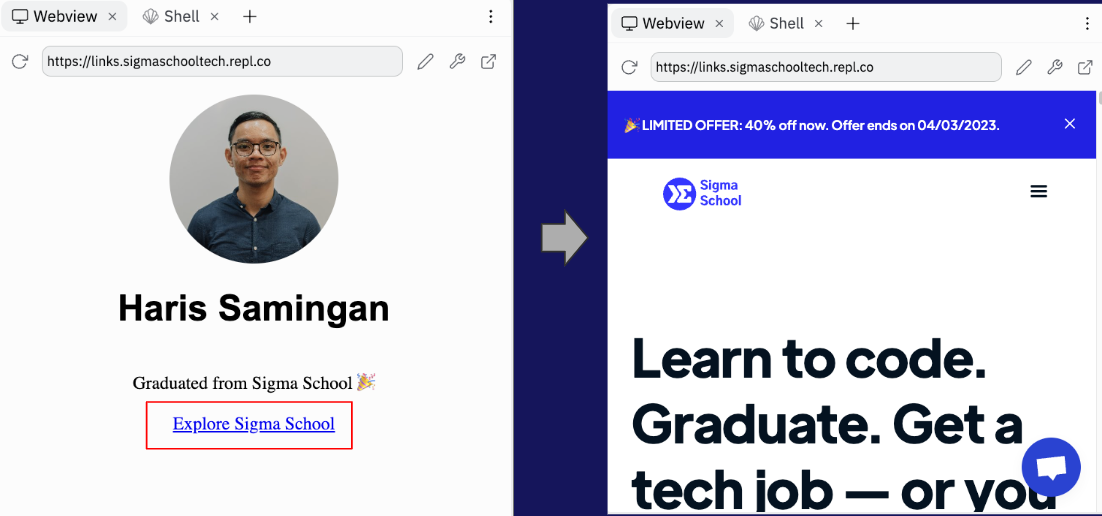
So far you have an image, a heading, and a paragraph. Next we will center them, then add a button.

Elements centering and creating button

This lesson has a task checklist in the portal, where you tick off each step and get feedback on the code you write. Do this lesson free.

Lesson 12 of 16 · 3 min

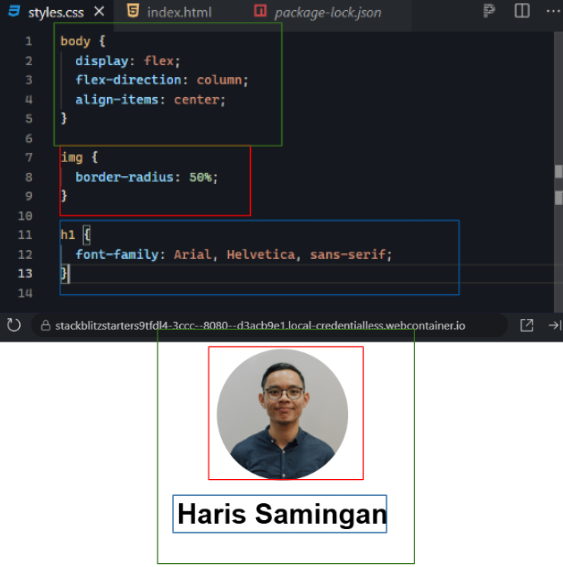
Center everything with Flexbox

Centering trips up a lot of developers, but we only need to center horizontally, which is simple. Go to styles.css, update the code to this, and run it:

body {
  display: flex;
  flex-direction: column;
  align-items: center;
}

img {
  border-radius: 50%;
}

h1 {
  font-family: Arial, Helvetica, sans-serif;
}

The photo and name centered on the page


Why rearrange the CSS code?

  • It makes your code readable. Developers appreciate code readability!
  • We arrange the CSS code according to their placement in the web browser.

Rearrange CSS code based on placement order


Here is what each line does:

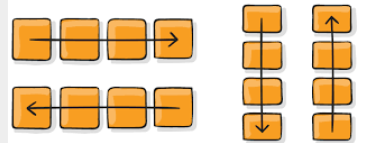
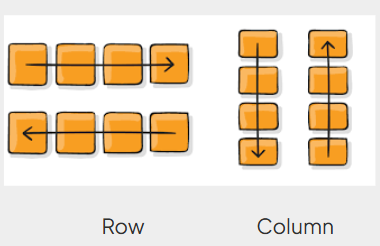
  • display: flex turns on Flexbox, a layout that arranges elements in rows or columns. It is called a one-dimension layout. Display flex guide

  • flex-direction: column stacks the elements top to bottom. Flex direction guide

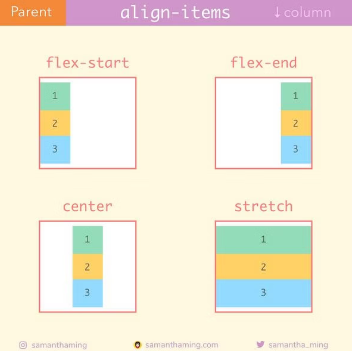
  • align-items: center lines them up in the center. Align items guide

Good work, your elements are centered!

This lesson has 1 quiz in the portal, where you tick off each step and get feedback on the code you write. Do this lesson free.

Lesson 14 of 16 · 4 min

Turn the link into a button

Now style that link into a button. Go to styles.css, add this rule, and run it:

h1 {
  font-family: Arial, Helvetica, sans-serif;
}

/* Add the below CSS code */
a {
  background-color: blue;
  color: white;
  border-radius: 4px;
  padding: 15px 50px;
  width: 330px;
  text-align: center;
  text-decoration: none;
  margin-bottom: 10px;
}

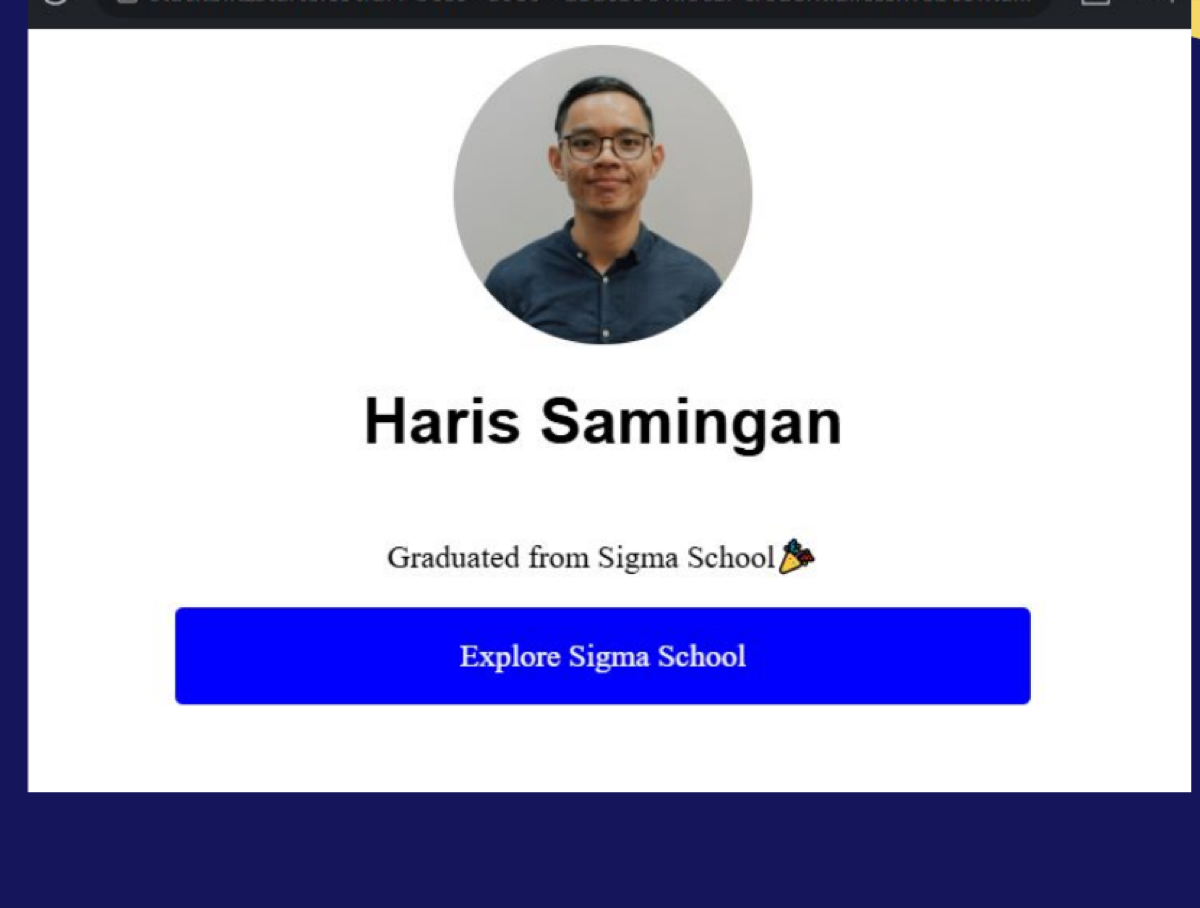
The link styled into a blue button

That is a real button! Here is what each property does:

  • background-color fills the button's background.
  • color sets the text colour (there is no text-color property, oddly).
  • border-radius rounds the corners.
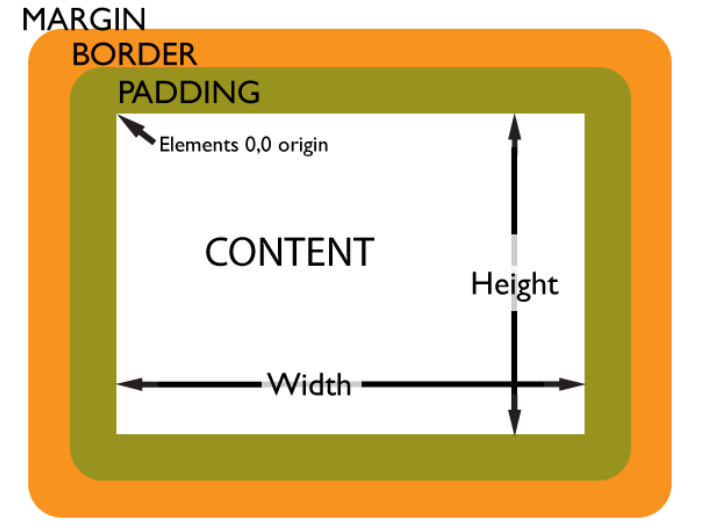
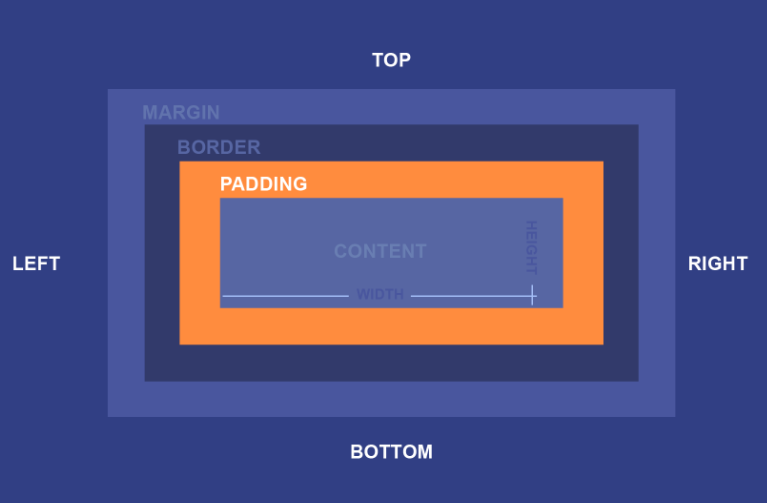
  • padding adds space inside the button (vertical, then horizontal).
  • width sets how wide it is. Width guide
  • text-align: center centers the text.
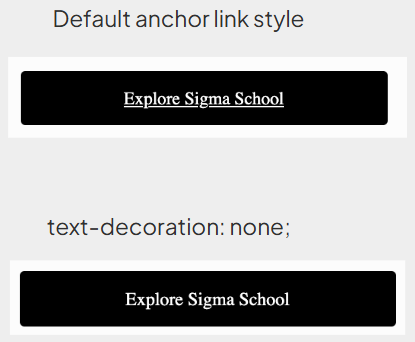
  • text-decoration: none removes the default link underline. Text decoration guide
  • margin-bottom adds space below it, handy when you add more buttons.

Concepts on padding, border and margin

This lesson has 1 quiz in the portal, where you tick off each step and get feedback on the code you write. Do this lesson free.

Lesson 15 of 16 · 3 min

One font for the whole page

Right now only your <h1> uses Arial. To make the whole page match, move the font-family to the body selector, then delete the h1 rule:

body {
  display: flex;
  flex-direction: column;
  align-items: center;
  font-family: Arial, Helvetica, sans-serif; /* Move to here*/
}

img { 
  border-radius: 50%;
}

/* Delete this rule
h1 {
  font-family: Arial, Helvetica, sans-serif;
}
*/

Move the line like a developer with a keyboard shortcut. The goal is to move font-family from the h1 rule into the body rule:
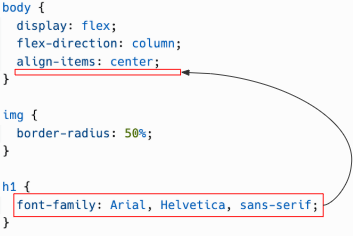
Move font-family from h1 to body

First, place your text cursor anywhere on the font-family line:
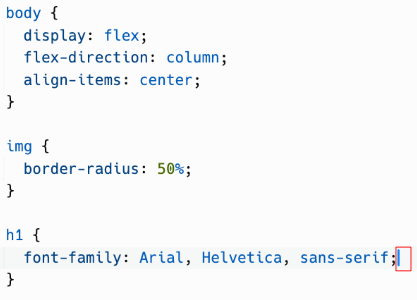
Text cursor on the font-family line

Hold Alt on Windows or Option on Mac, then press the Up Arrow key. The whole line moves up without needing to cut and paste it:
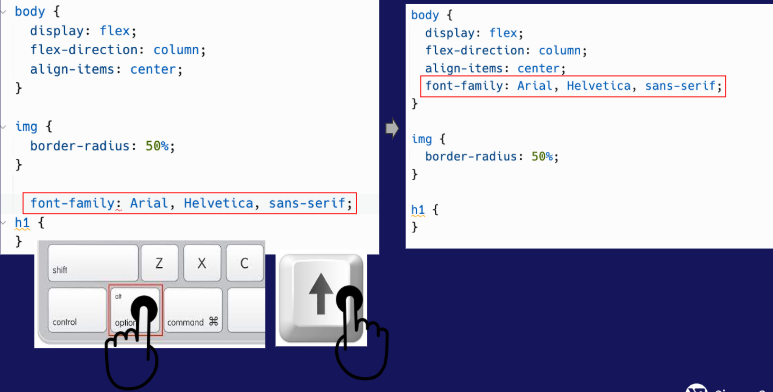
Move the font-family line with Alt or Option and Up Arrow

Keep pressing Up Arrow while holding Alt or Option until the line is directly below align-items: center;. Then remove the empty h1 rule.


Why does one line style everything?

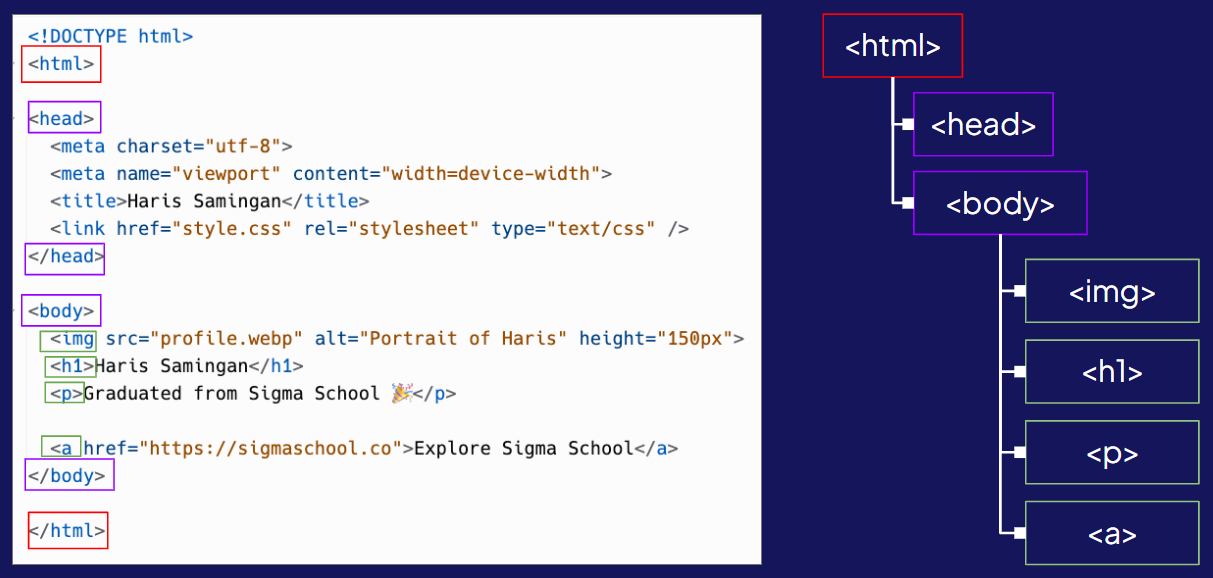
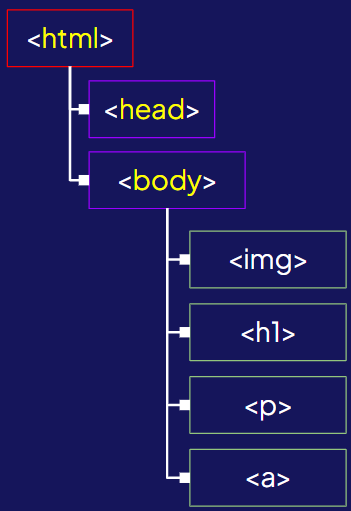
  • Because of inheritance. Think of the page as a family tree: The HTML elements arranged as a parent and child hierarchy

    • <html> is the parent of <head> and <body>.
    • <body> is the parent of <img>, <h1>, <p>, and <a>.

Some styles, including color and font-family, pass from a parent to its children. For example, if <html> has yellow text, its descendants inherit that colour unless they have their own colour rule:
Yellow text colour passing from html to its child elements

The same thing happens when font-family: Arial, Helvetica, sans-serif; is set on body. Text inside its child elements, such as h1, p, and a, inherits the font. You only need one rule instead of repeating font-family for every element.

This passing down of styles is part of the cascade, the "C" in CSS. A child can still use a different style when you give it a more specific rule.
This lesson has 1 quiz in the portal, where you tick off each step and get feedback on the code you write. Do this lesson free.

Lesson 16 of 16 · 3 min

Add more buttons and publish

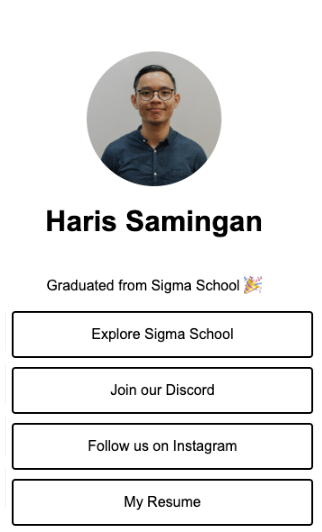
You have a real web page now: photo, name, tagline, and a button.

body {
  display: flex;
  flex-direction: column;
  align-items: center;
  font-family: Arial, Helvetica, sans-serif;
}

img {
  border-radius: 50%;
}

a {
  background-color: black;
  color: white;
  border-radius: 4px;
  padding: 15px 0px;
  width: 330px;
  text-align: center;
  text-decoration: none;
  margin-bottom: 10px;
}

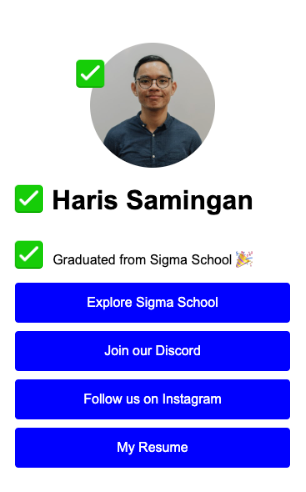
The finished link-in-bio page

Make it truly yours:

  • Easy: add more buttons that link to your resume from Day 1, your LinkedIn, and anything else. Each button is just another <a> tag.
  • Medium: try turning them into outlined buttons instead of solid ones.

Easy and medium challenges

Like Day 1, your StackBlitz project is already live, the public link is in the preview's address bar. Copy it and open it in a new tab to see your page on the internet.

🎉 Congratulations! You have created a web application.

If you get stuck, compare with the full code example.

Day 2 completed!

This lesson has a task checklist in the portal, where you tick off each step and get feedback on the code you write. Do this lesson free.

Reading it is step one. Doing it is the point.

Everything above is the full teaching content, free to read. The same lessons in Sigmo add 12 quizzes that mark themselves, 4 hands-on checklists, and an AI coding buddy that answers questions about the exact line you are stuck on. No card needed.

Do this course free

You just read it. Now go build it.

The free trial puts you inside Sigmo, the learning portal our students use every day, with the quizzes, the checklists and an AI buddy on every lesson. No card needed.