Build a Personality Quiz with JavaScript

Build a Buzzfeed-style personality quiz that scores answers and shows a result type. The bonus project that pulls together everything from the free course.

8 lessonsAbout 27 minFree, no account needed

What you learn

  • Scoring logic
  • Working with objects
  • Combining what you have learned

Lesson 1 of 8 · 2 min

What you are building

This bonus project brings the whole week together: a page asks three questions, sends the answers to an AI, and reveals a playful personality card.

Prefer to follow along with a walkthrough? Watch it here, or open the Day 7 video in a new tab.

Day 7 walkthrough: Build an AI personality quiz

What you are learning:

  • how to use AI with a custom prompt to get a unique result;
  • how to use Axios to request information from an API;
  • how to use Git to save your changes;
  • how to use GitHub Pages to get a public link for your site.

By the end you will have a real AI-powered app, live on the internet.

This lesson has 1 quiz in the portal, where you tick off each step and get feedback on the code you write. Do this lesson free.

Lesson 2 of 8 · 3 min

Set up the Personality Quiz project

Set up a fresh StackBlitz project:

  1. Click New Project and choose the HTML, CSS, JS project.
  2. Rename it Personality Quiz.
  3. Open Settings and change the compile trigger to Save.
  4. Delete page2.html.

Then add the picture for your quiz:

  1. Download this image (a very regal playing-card lady).
  2. Drag it beside index.html and name it exactly elegant_lady.png. The page will use src="elegant_lady.png", so the names must match.
  3. Clear the default text in index.html, styles.css, and index.js so you start from a clean slate.

This lesson has a task checklist in the portal, where you tick off each step and get feedback on the code you write. Do this lesson free.

Lesson 3 of 8 · 3 min

Build the quiz page

Build the page in index.html: update the code to this:

<!DOCTYPE html>
<html lang="en">
  <head>
    <meta charset="UTF-8" />
    <meta name="viewport" content="width=device-width, initial-scale=1.0" />
    <script src="https://cdn.jsdelivr.net/npm/axios/dist/axios.min.js"></script>
    <title>Personality Quiz</title>
    <link rel="stylesheet" href="styles.css" />
  </head>
  <body>
    <div>
      <h1>Personality Quiz</h1>
      <p>
        Answer three simple questions to find out what personality type you are!
      </p>
      <img src="elegant_lady.png" />

      <label>1) What is your favorite hobby?</label>
      <input id="hobby" type="text" />

      <label>2) Who is your least favorite character from a show or movie?</label>
      <input id="character" type="text" />

      <label>3) What are your plans for tomorrow?</label>
      <input id="color" type="text" />

      <button onclick="getPersonality()">Reveal my card</button>

      <div id="result"></div>
    </div>
    <script src="script.js"></script>
  </body>
</html>

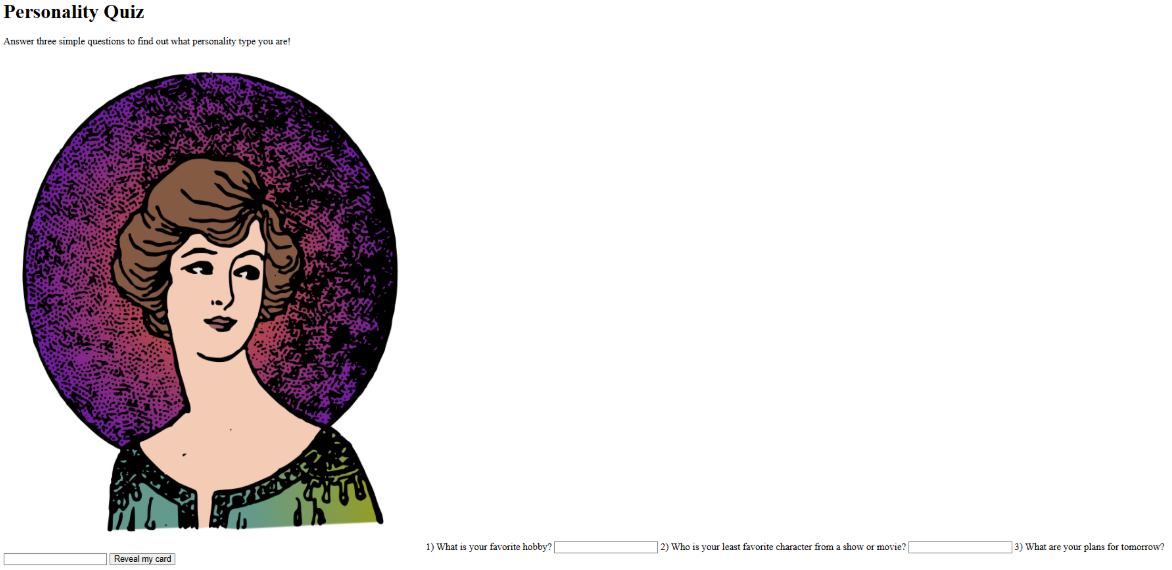
Let's check out our website. What a mess! We need to add some styling right away.

Website appearance before styling applies

In styles.css, update the code to this:

body {
  max-width: 520px;
  margin: 0 auto;
}

p {
  font-size: 20px;
}

label {
  font-size: 20px;
}

img {
  height: 20vw;
  display: block;
  margin: auto;
}

input {
  width: 100%;
  padding: 8px;
  font-size: 14px;
  border: 1px solid #aaa;
  background: #fff;
}

button {
  margin-top: 24px;
  padding: 10px;
  width: 100%;
  font-size: 15px;
  color: white;
  background: purple;
  cursor: pointer;
}

#result {
  margin: 30px;
  padding-top: 20px;
  border-top: 1px solid #ccc;
  font-size: 25px;
  color: purple;
}

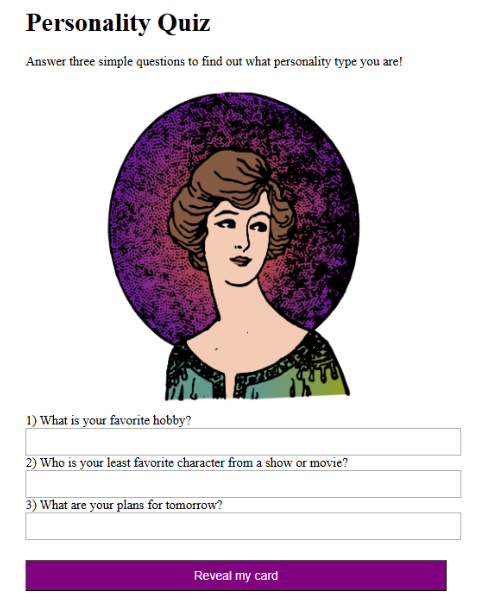
Run the code, and it should look like this. Much better!

Website appearance after styling is applied

This lesson has a task checklist in the portal, where you tick off each step and get feedback on the code you write. Do this lesson free.

Lesson 4 of 8 · 2 min

Meet Axios

Most of this you already know from Days 2 and 4. There is one new <script> line on the page:

<script src="https://cdn.jsdelivr.net/npm/axios/dist/axios.min.js"></script>

This loads a function called axios into your project.

Axios is a JavaScript library for making HTTP requests. It works both in Node.js and in the browser.

You use it to request data from a server. If the request succeeds, the server responds with the data you asked for.

your page   --- request --->   an AI server
your page   <-- response ---   your personality card

In this project you use Axios to send your three answers to an AI model and get a card back. First you need a model to talk to, and a key that proves you are allowed to use it.

This lesson has 2 quizzes in the portal, where you tick off each step and get feedback on the code you write. Do this lesson free.

Lesson 5 of 8 · 3 min

Get your OpenRouter AI key

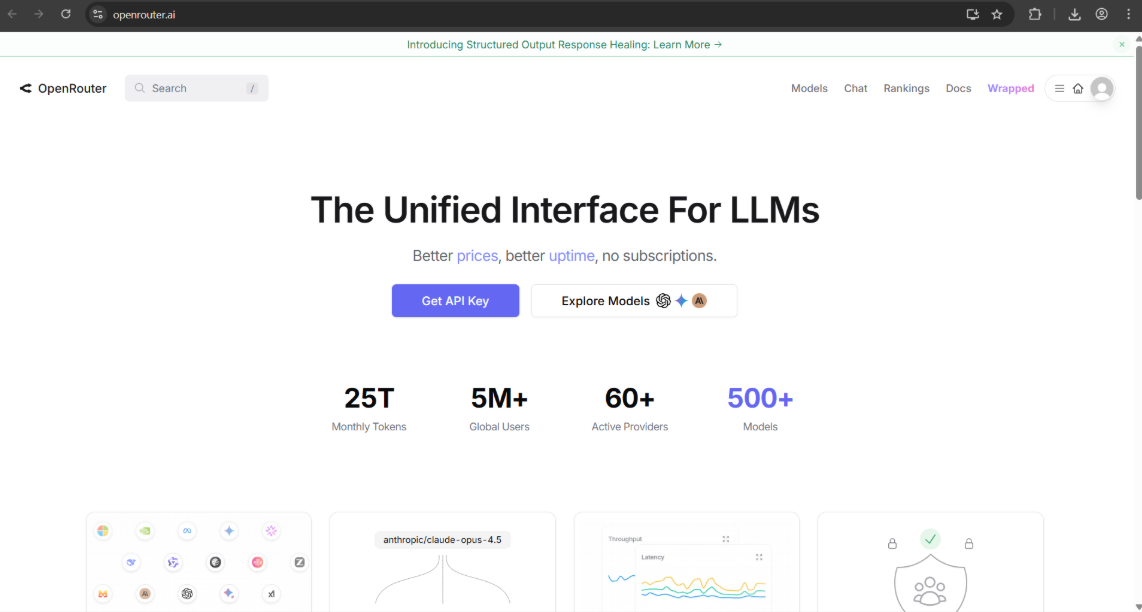
OpenRouter is a free platform that lets you use many AI models through one account. Go to openrouter.ai.

OpenRouter home page


Create your account and key:

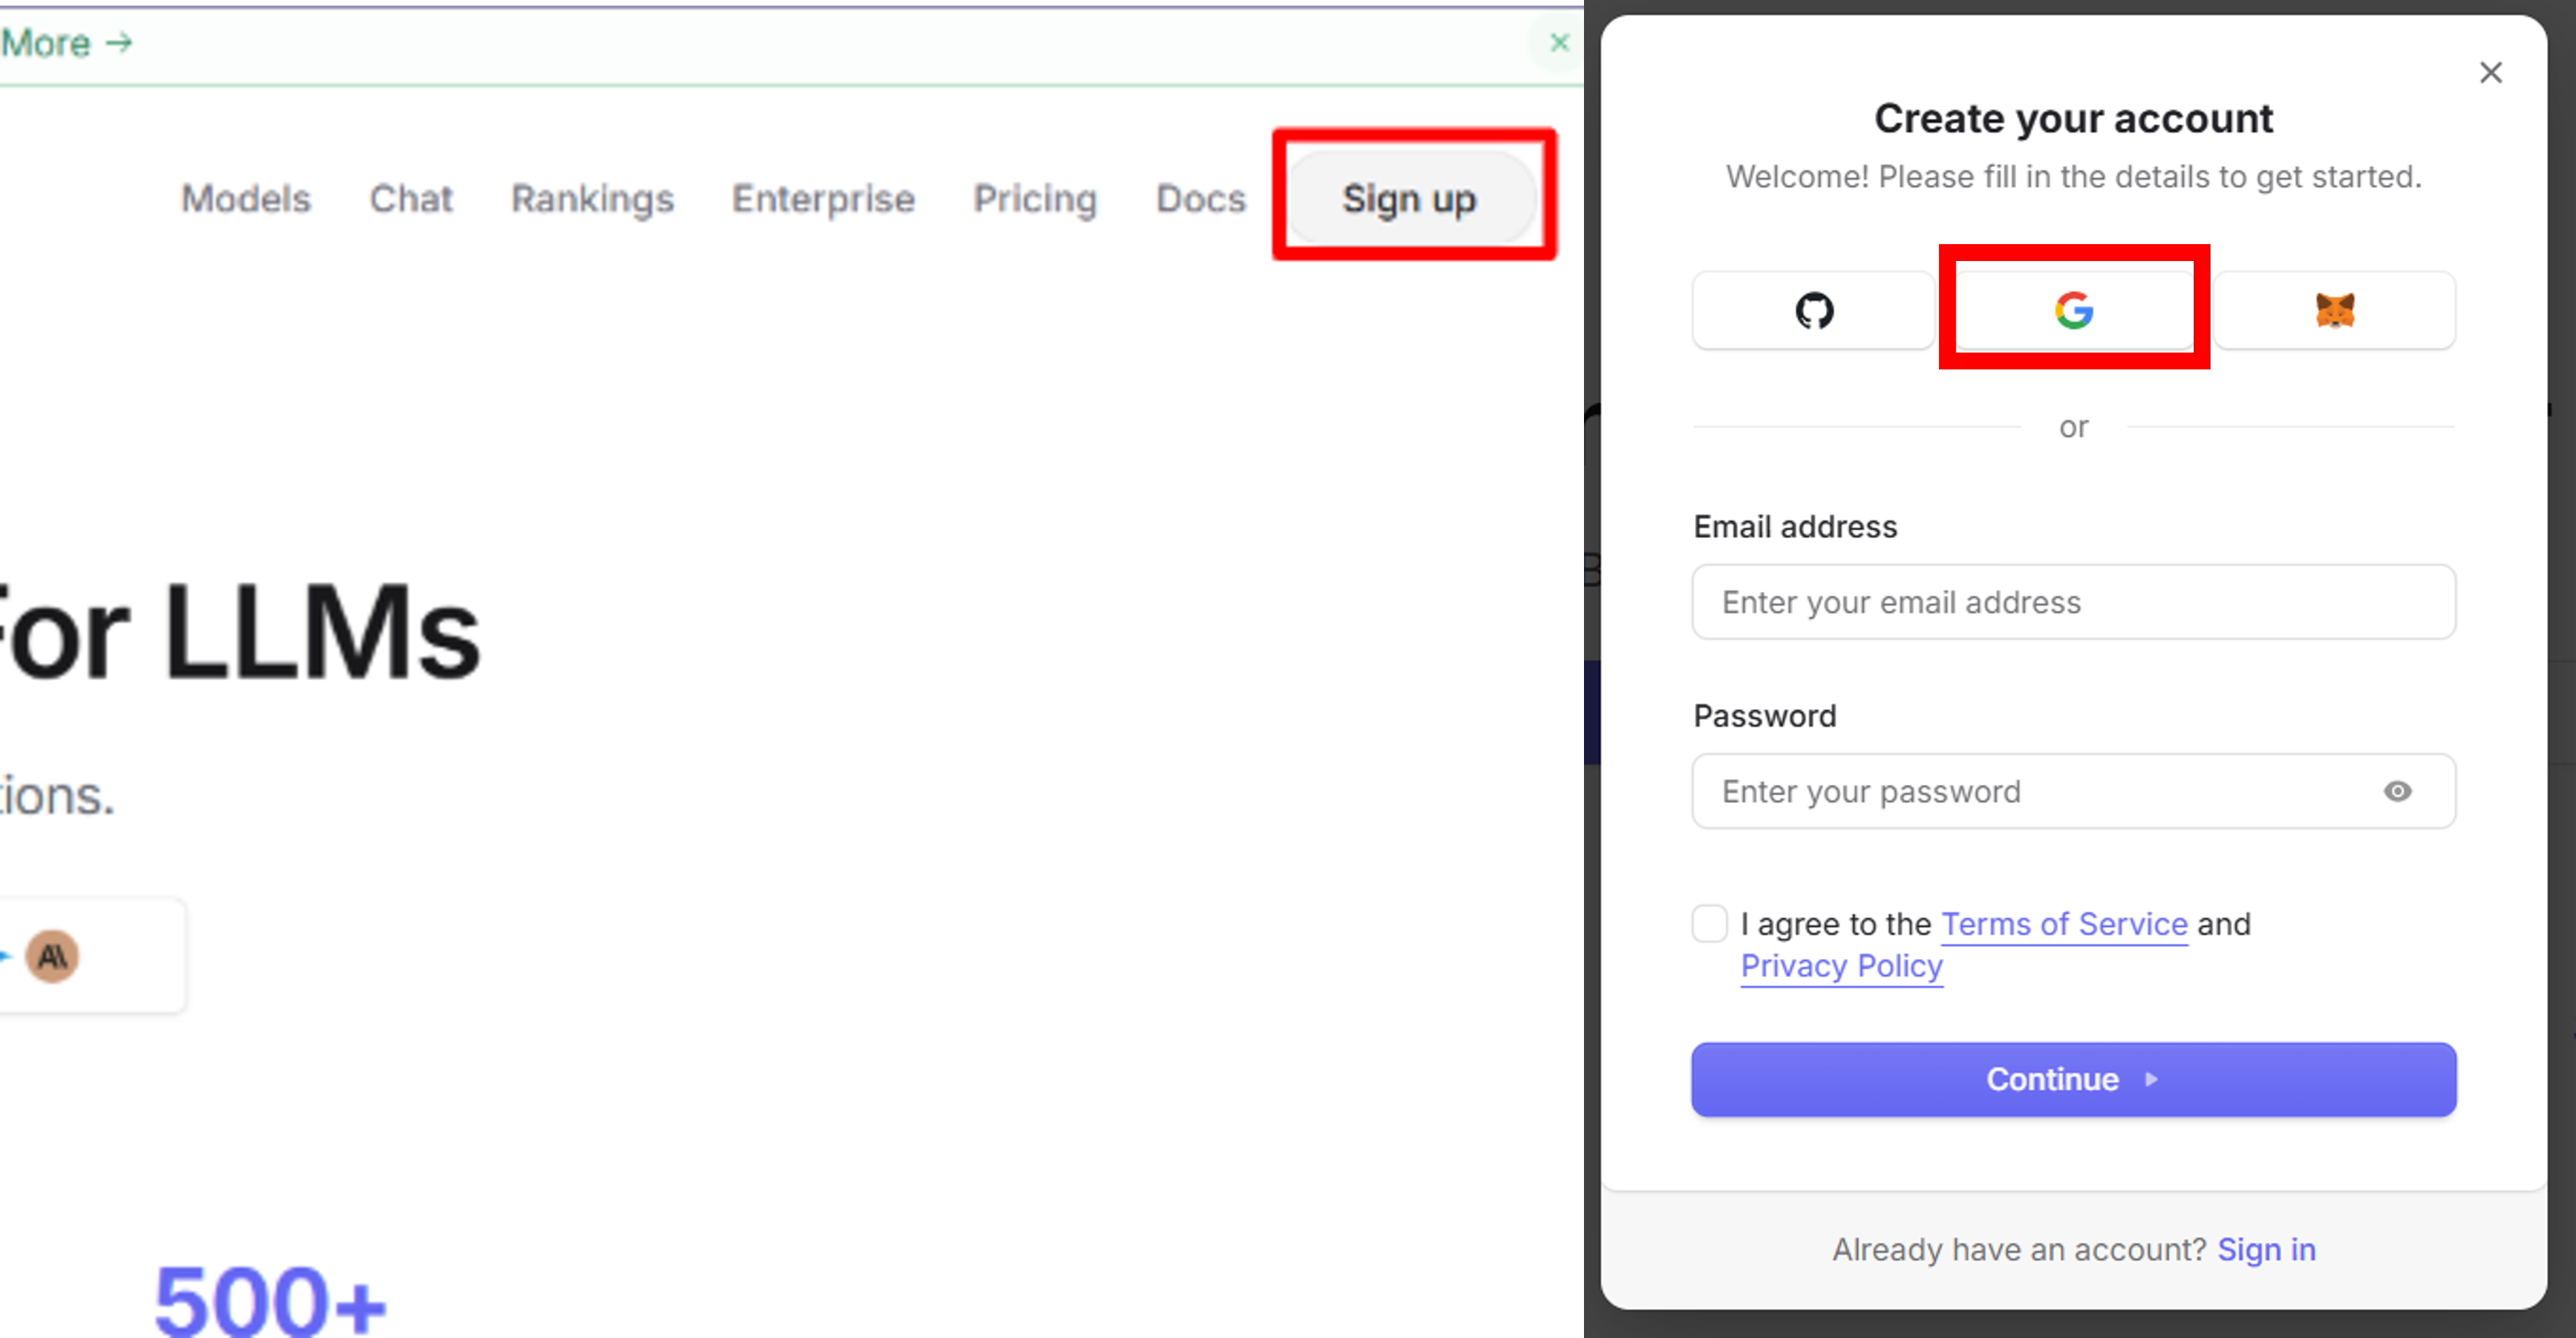
  1. Click Sign Up, then Continue with Google.

    OpenRouter signup account

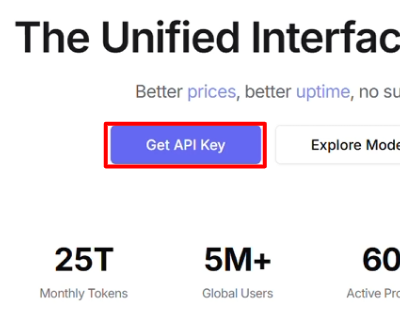
  2. Back on the Home Page, click on Get API Key button.

    OpenRouter Get API Key button

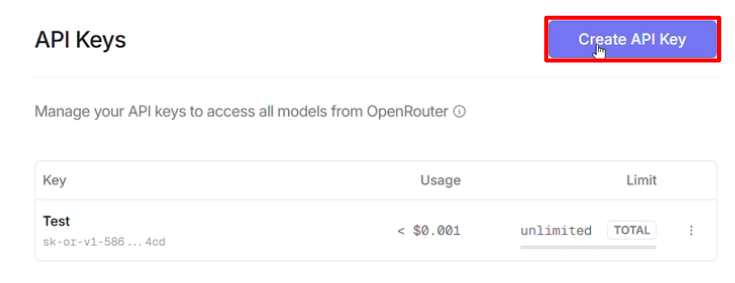
  3. Click on Create API Key button.

    OpenRouter Create API Key button

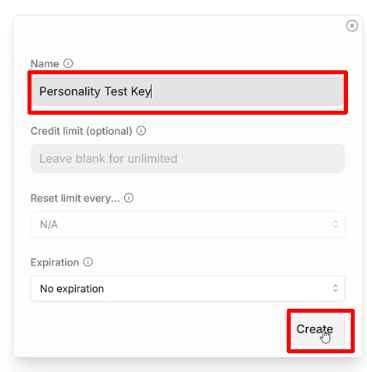
  4. Name it Personality Test Key, then click Create.

    OpenRouter key naming and create key

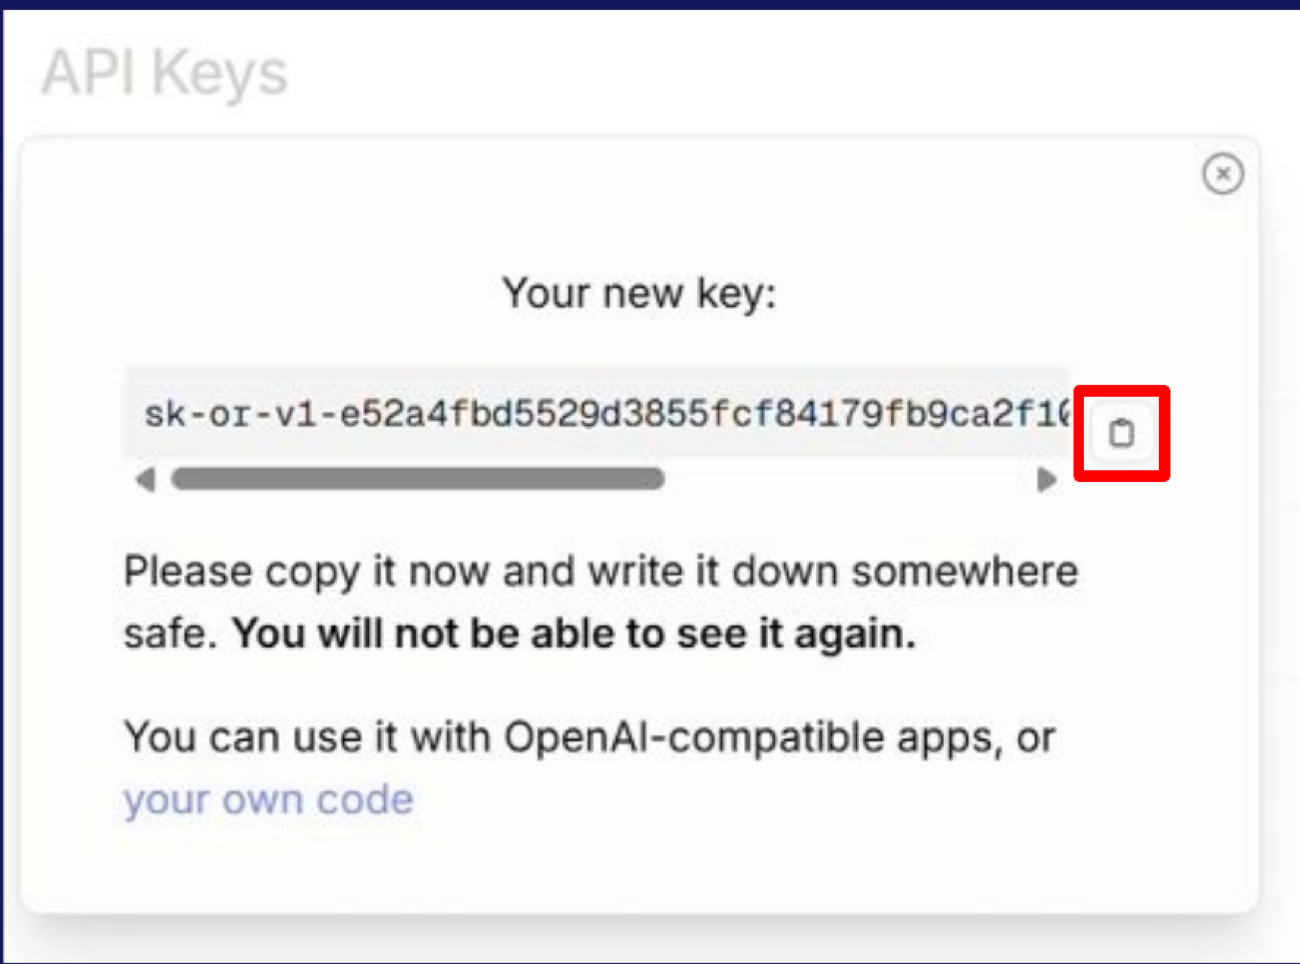
  5. Copy the key and keep it somewhere safe until we need it later.

    Copying your new OpenRouter API key

  6. Go back to the Home Page.

    OpenRouter browse to home

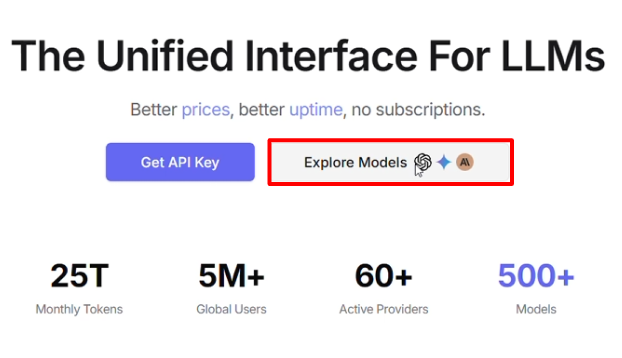
  7. Click on Explore Models to choose an AI Model to use.

    OpenRouter explore models

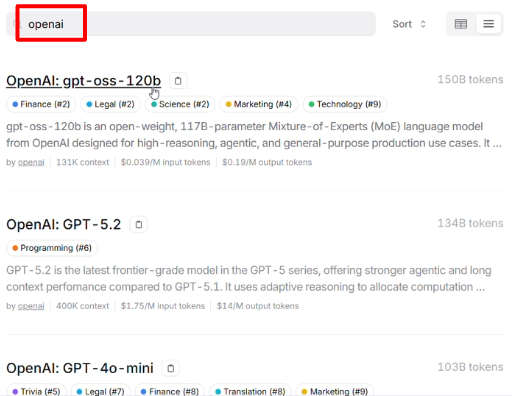
  8. Search for openai, then choose gpt-oss-120b. Choosing the gpt-oss-120b model in OpenRouter


⚠️ Keep your key private.

An API key is like a password. Do not share it or commit it to a public GitHub repository.

Learn more about the model.

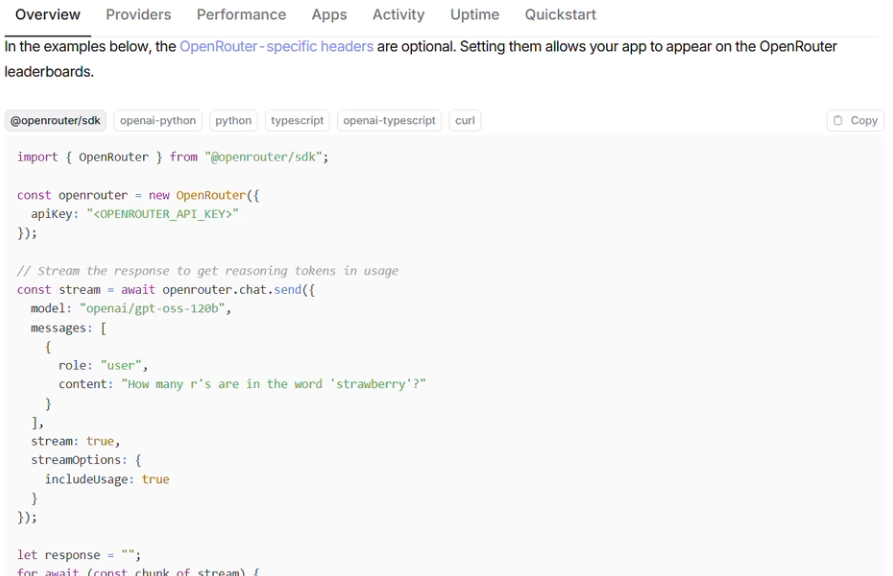
You can also click on the model name and see a lot of information about how to use it!

Model details

This lesson has a task checklist in the portal, where you tick off each step and get feedback on the code you write. Do this lesson free.

Lesson 6 of 8 · 4 min

Wire up the AI request

Now write script.js. It reads the three answers, builds a prompt, and uses Axios to ask the model for a card.

First, copy this prompt:

You are a personality quiz engine based on a deck of cards. Based only on the answers below, assign ONE personality: - Suit: Hearts, Diamonds, Clubs, or Spades - Type: Ace, King, Queen, Jack, or Joker Answers: Favorite color: ${favColor} Favorite hobby: ${favHobby} Least favorite character: ${leastFavCharacter} Give: 1) The final card (e.g. "Queen of Hearts") 2) A brief 2-3 sentence explanation Rules: - Be decisive (no multiple options) - Keep it short - Output plain text only - No formatting, no lists, no emojis

Then, in script.js add the code:

const API_KEY = 'sk-or-v1-****************************************************************'; // Replace this with the API Key that you copied earlier
const hobbyInput = document.getElementById('hobby');
const characterInput = document.getElementById('character');
const colorInput = document.getElementById('color');
const resultDiv = document.getElementById('result');

async function getPersonality() {
  // Get user's answers
  const favHobby = hobbyInput.value;
  const leastFavCharacter = characterInput.value;
  const favColor = colorInput.value;

  // Ask OpenAI for the users personality
  resultDiv.innerHTML = 'Loading...';
  const response = await axios.post(
    'https://openrouter.ai/api/v1/chat/completions',
    {
      model: 'openai/gpt-oss-120b',
      messages: [
        {
          role: 'user',
          // Paste the prompt that you copied earlier
          content: 'You are a personality quiz engine based on a deck of cards. Based only on the answers below, assign ONE personality: - Suit: Hearts, Diamonds, Clubs, or Spades - Type: Ace, King, Queen, Jack, or Joker Answers: Favorite color: ${favColor} Favorite hobby: ${favHobby} Least favorite character: ${leastFavCharacter} Give: 1) The final card (e.g. "Queen of Hearts") 2) A brief 2-3 sentence explanation Rules: - Be decisive (no multiple options) - Keep it short - Output plain text only - No formatting, no lists, no emojis',
        },
      ],
    },
    {
      headers: {
        Authorization: 'Bearer ${API_KEY}',
        'Content-Type': 'application/json',
      },
    }
  );

  const personalityMessage = response.data.choices[0].message.content;

  // Display the users personality in the screen
  resultDiv.innerHTML = personalityMessage;
}

How the Axios call works?

const response = await axios.post(
  // URL
  'https://openrouter.ai/api/v1/chat/completions',
  // Object with model and messages
  {
    model: 'openai/gpt-oss-120b',
    messages: [
      {
        role: 'user',
        content: 'You are a personality quiz engine based on a deck of cards. Based only on the answers below, assign ONE personality: - Suit: Hearts, Diamonds, Clubs, or Spades - Type: Ace, King, Queen, Jack, or Joker Answers: Favorite color: ${favColor} Favorite hobby: ${favHobby} Least favorite character: ${leastFavCharacter} Give: 1) The final card (e.g. "Queen of Hearts") 2) A brief 2-3 sentence explanation Rules: - Be decisive (no multiple options) - Keep it short - Output plain text only - No formatting, no lists, no emojis',
      },
      ...

Axios takes two main inputs:

  • The URL of what you are talking to (the AI model). In this case, it is OpenAI.
  • An object with the model and the messages you send.

Using await tells JavaScript to wait for the response before continuing.

Save, run, answer the three questions, and click the button. After a moment your personality archetype appears:
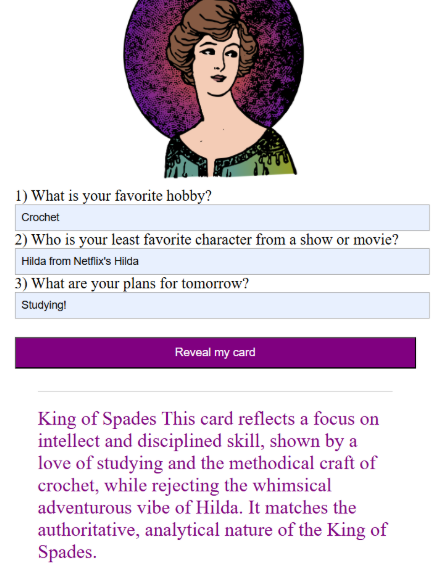
The finished quiz revealing a King of Spades personality card

This lesson has 1 quiz in the portal, where you tick off each step and get feedback on the code you write. Do this lesson free.

Lesson 7 of 8 · 6 min

Save your code with Git and GitHub

GitHub is a website where developers store and share their code. It is also where recruiters look for your projects, and where you keep backups.

It saves your work using Git, a way to keep different versions of a project. If version 10 breaks, you can go back to version 9 that worked.

Put your project on GitHub:

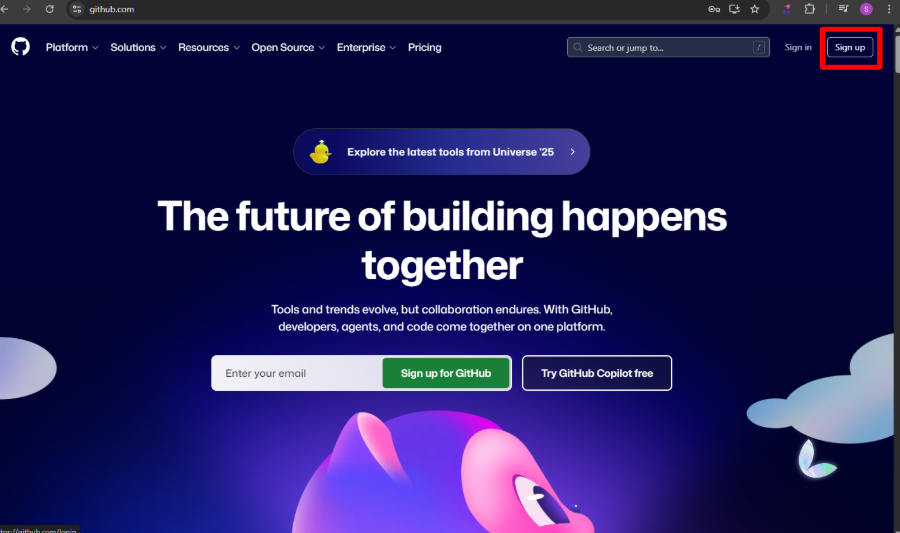
  1. Visit the Github Website and click Sign Up.

    GitHub home page

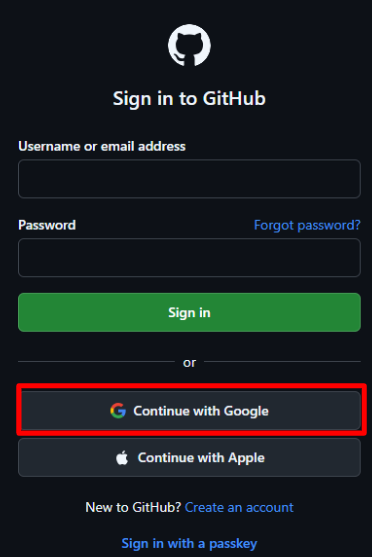
  2. Click on Continue with Google.

    GitHub signup with google

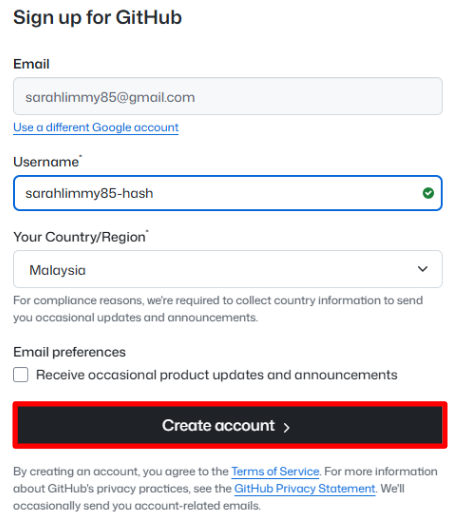
  3. Fill up the details and click Create account.

    GitHub create account

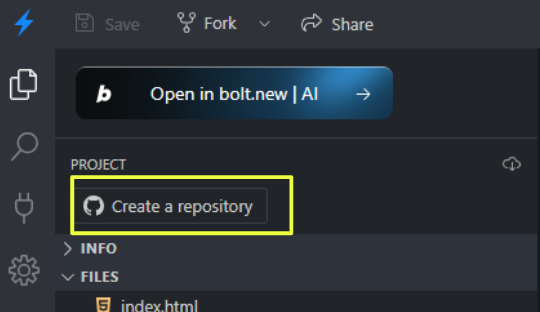
  4. In StackBlitz, click on Create a repository.

    StackBlitz create repository

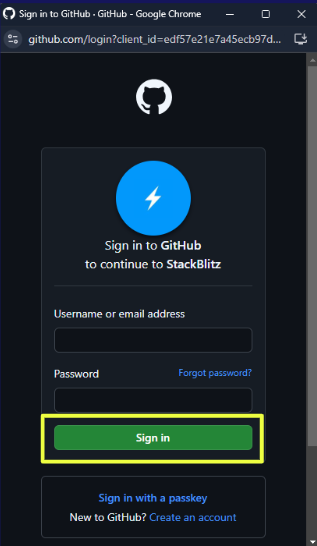
  5. Sign in with the GitHub account you registered earlier.

    Sign in with GitHub account

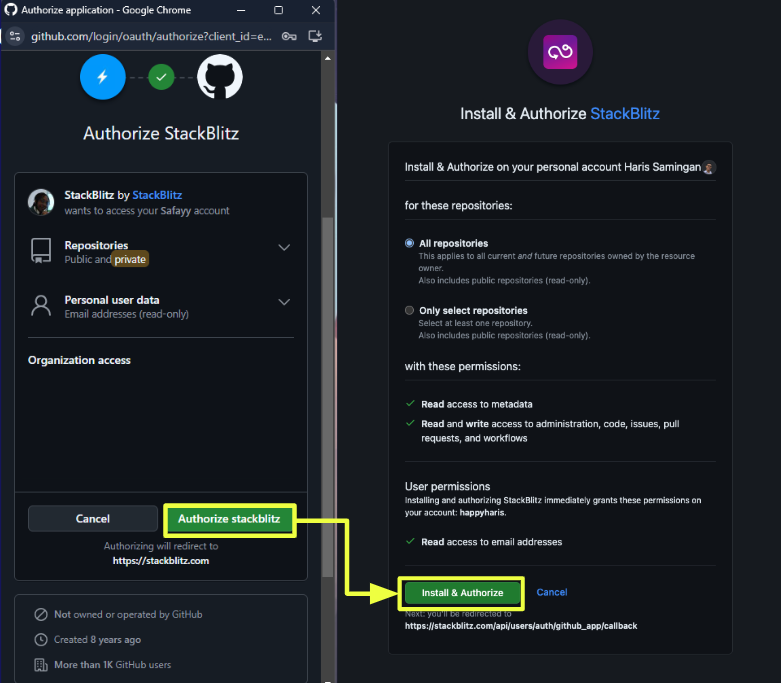
  6. Click on Install & Authorize.

    GitHub Install and Authorize

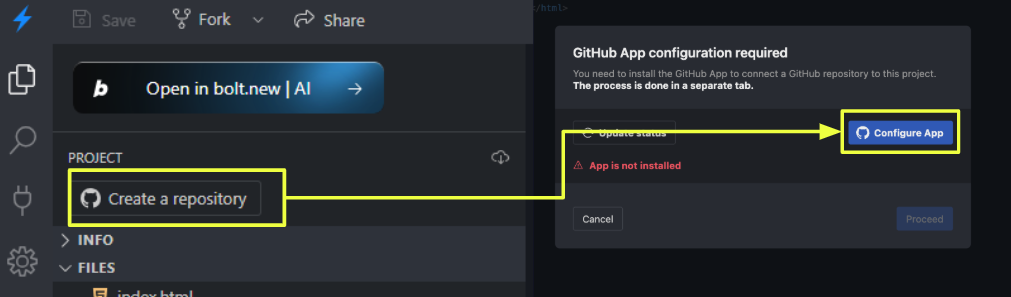
  7. Click on Create a repository and then the Configure App.

    GitHub Configure GitHub to StackBlitz

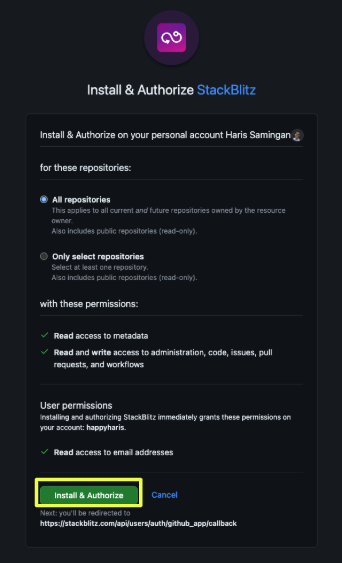
  8. Click on Install & Authorize.

    GitHub Install and Authorize on StackBlitz

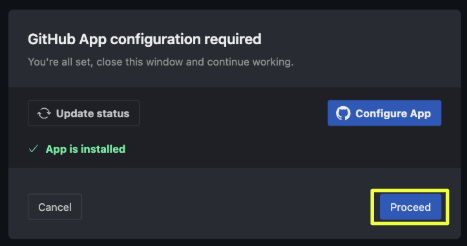
  9. Click on Proceed.

    StackBlitz proceed app configuration

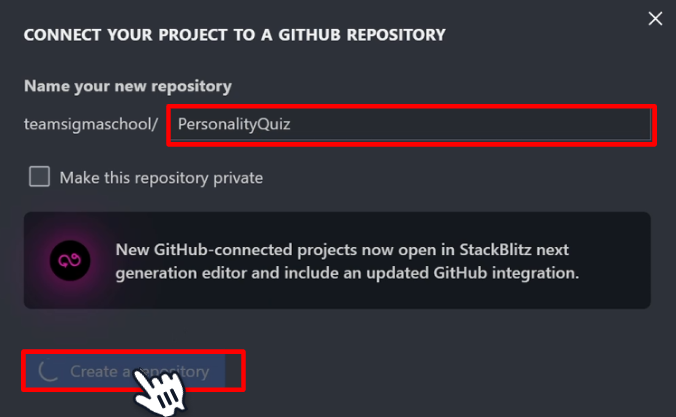
  10. Name your repository (for example PersonalityQuiz) and click Create.

    Name and create GitHub repository


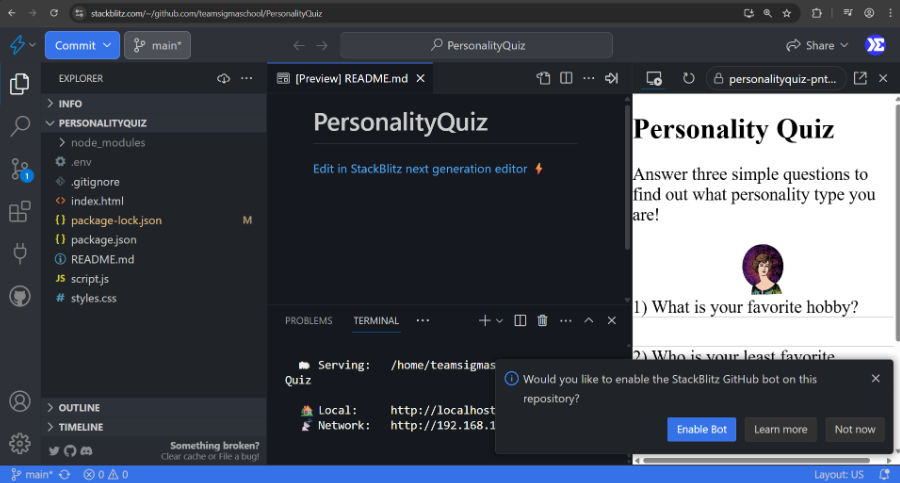
You should be looking at this page:

StackBlitz connected with GitHub

GitHub Repositories

A GitHub repository is the online home for one project. It stores your code and its version history, much like your StackBlitz project.

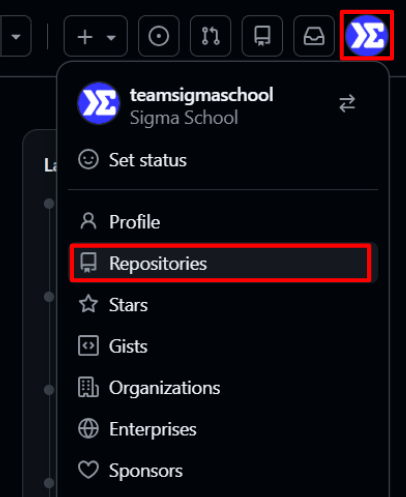
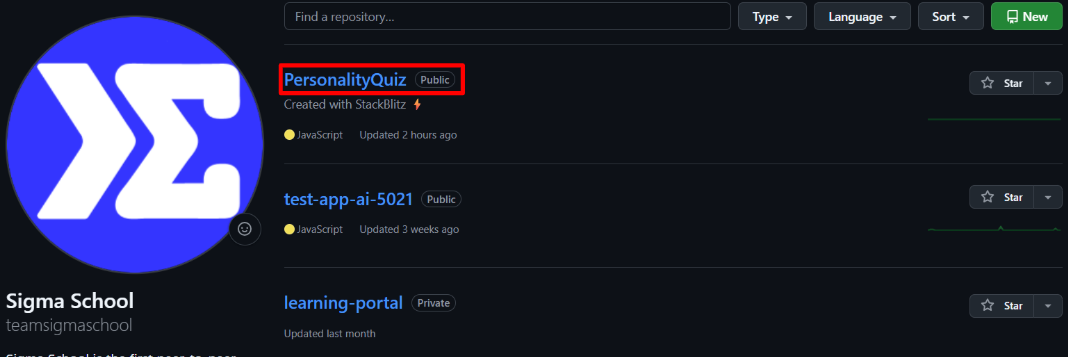
Open your repositories from GitHub:

Open your repositories on GitHub

Select the PersonalityQuiz repository:

Select the PersonalityQuiz repository

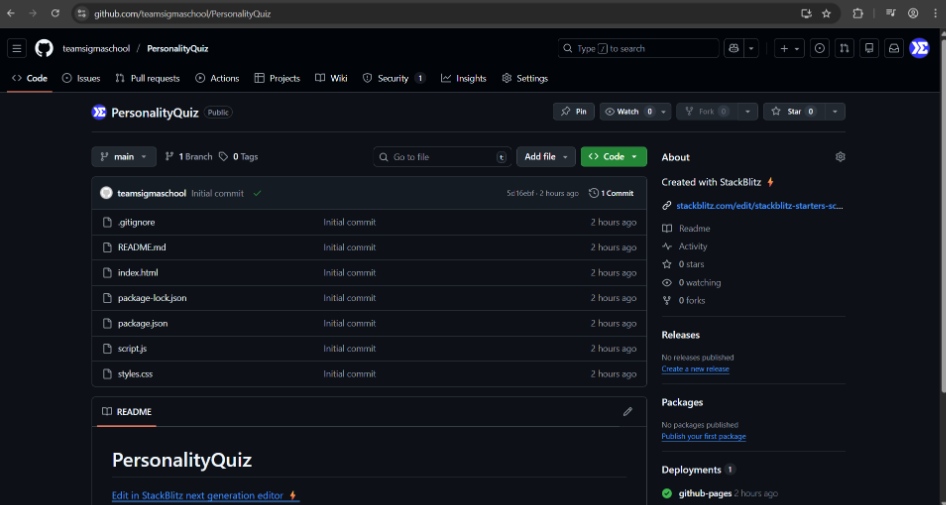
Your Personality Quiz project is now on GitHub:

The PersonalityQuiz repository on GitHub

GitHub is where developers store and share projects. Recruiters and employers also use it to review your work. Git gives each repository a version history, so you can return to an earlier working version if a later change breaks.


Make a change

In styles.css, add this h1 rule below the body rule:

body {
  max-width: 520px;
  margin: 0 auto;
}

/* Add this rule */
h1 {
  font-size: 40px;
  font-weight: bold;
  text-align: center;
  padding: 20px;
  background: linear-gradient(90deg, #a259ff, #7b2ff7, #d291ff);
  -webkit-background-clip: text;
  -webkit-text-fill-color: transparent;
}

p {
  font-size: 20px;
}

In index.html, change the heading to uppercase:

...
<body>
  <div>
    <h1>PERSONALITY QUIZ</h1> <!-- Update this line -->
    <p>
      Answer three simple questions to find out what personality type you are!
    </p>
...

Save all your files. These changes are saved in StackBlitz, but they are not on GitHub yet.

Commit and push the change

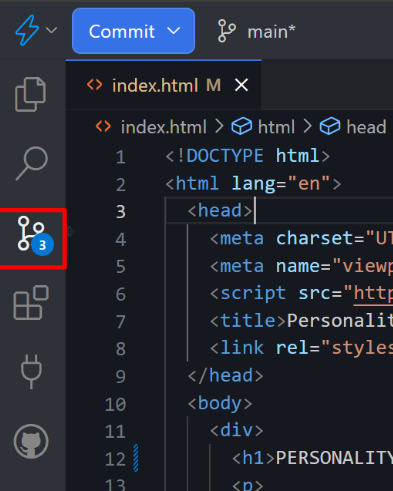
  1. Click the Git button.

    The Git button in StackBlitz

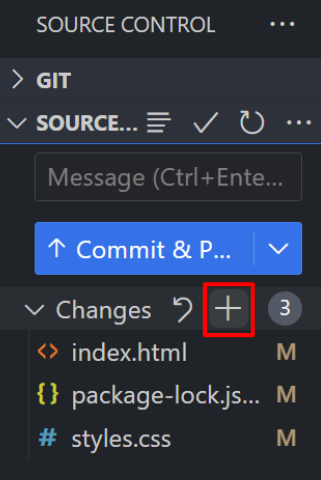
  2. Click the + button to stage all changed files. Staging selects the files that will be included in this version.

    Stage the changed files in StackBlitz

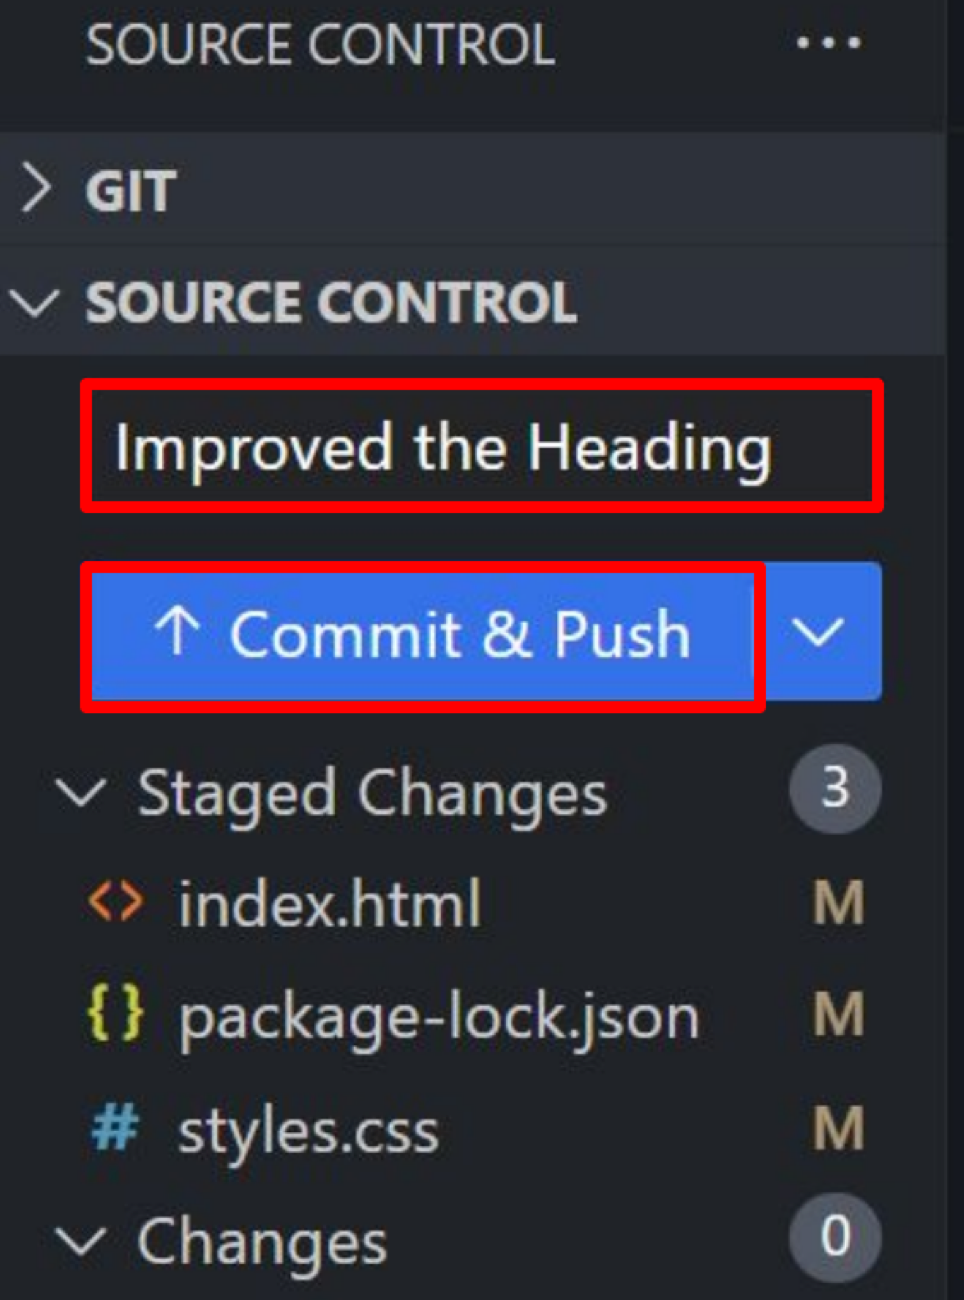
  3. Add a short description of the change, then click Commit & Push.

    Add a description and click Commit and Push

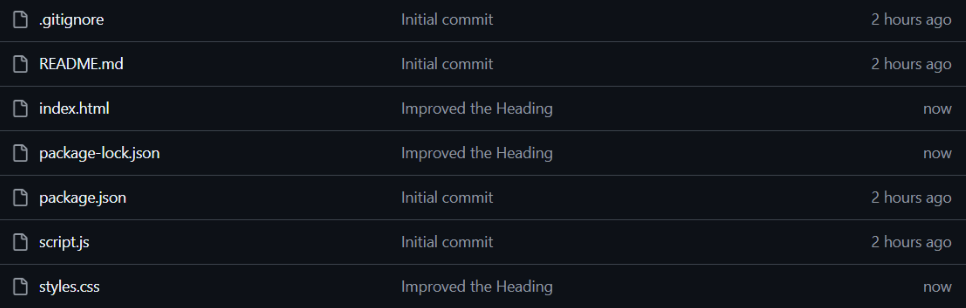
The commit saves a new version. The push sends that version to GitHub. Refresh your repository and confirm that the updated files appear:

The latest code changes on GitHub

Your code and its version history are now backed up on GitHub. Next, you will turn the repository into a public website.

This lesson has 1 quiz in the portal, where you tick off each step and get feedback on the code you write. Do this lesson free.

Lesson 8 of 8 · 4 min

Publish with GitHub Pages

Your code is on GitHub, but people cannot use the quiz yet. GitHub Pages turns your repository into a public website.

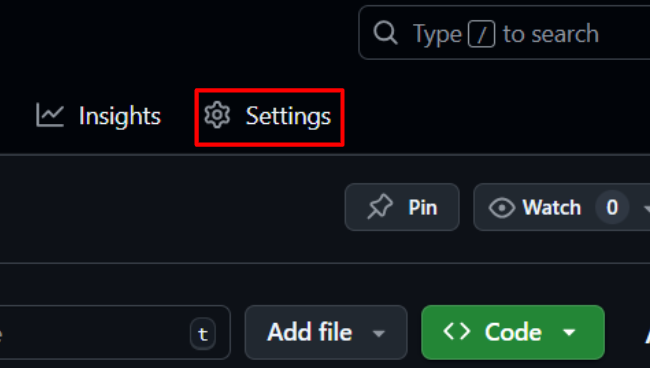
  1. In your PersonalityQuiz repository, open Settings.

    Open the repository Settings page

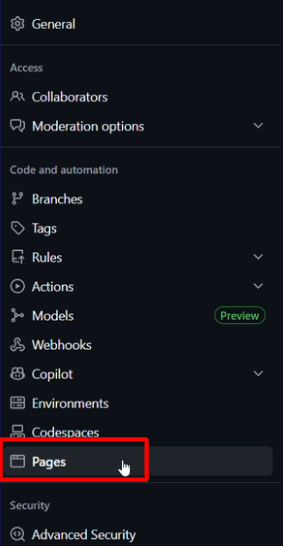
  2. In the sidebar, open Pages.

    Open the GitHub Pages settings

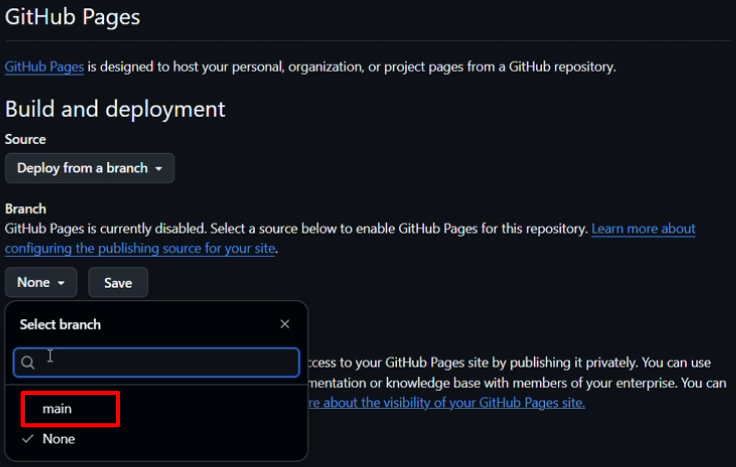
  3. Under Build and deployment, set Source to Deploy from a branch. Open the branch menu and select main.

    Select the main branch as the GitHub Pages source

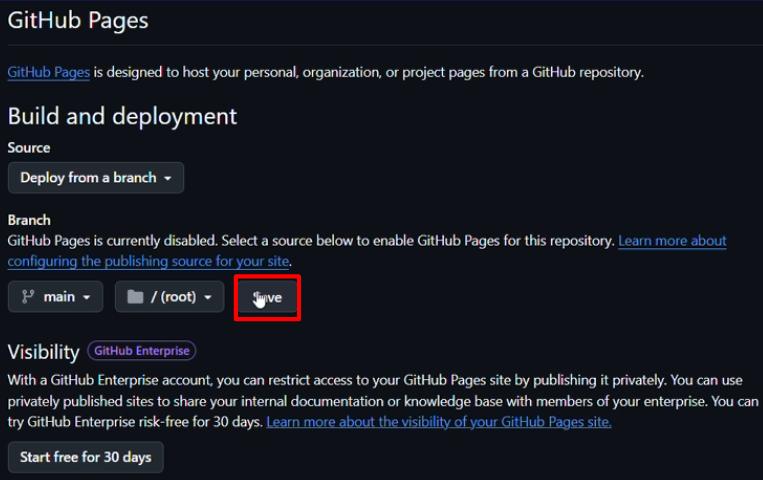
  4. Keep the folder set to /(root), then click Save.

    Save the GitHub Pages branch settings

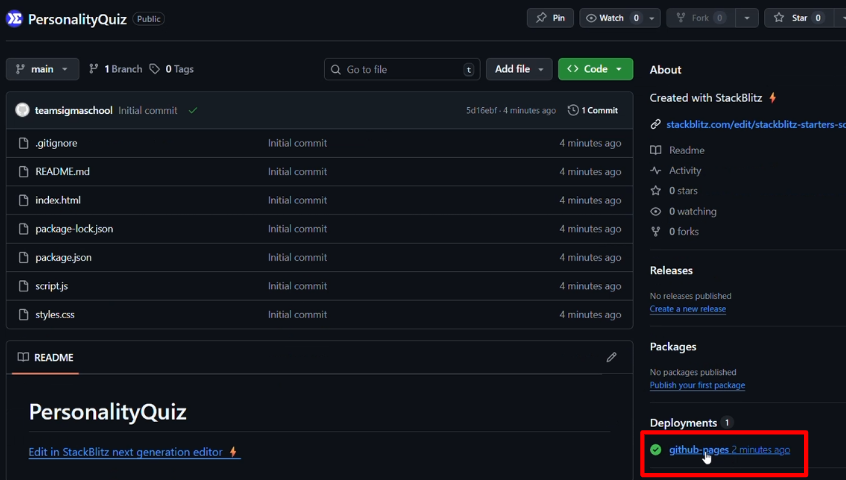
  5. GitHub needs a little time to build the site. Refresh the Pages settings after a few minutes, then click Visit site when the deployment link appears.

    The deployed GitHub Pages link

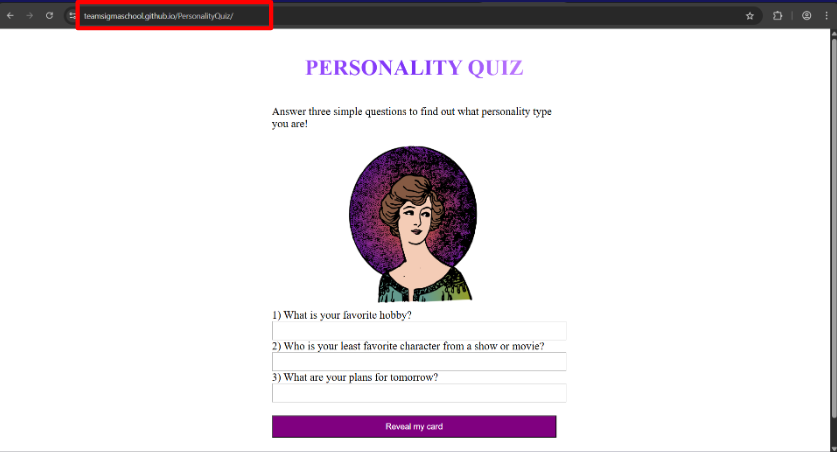
You now have a public link. Every time you commit and push new code, this site updates automatically. Share it with a friend!

The personality quiz at its public GitHub Pages URL

⚠️ Important security note: API keys are passwords. Any key placed in browser JavaScript or committed to a public GitHub repository can be read by other people. Never publish a personal or production key. A real application sends AI requests through a secure server that keeps the key private.

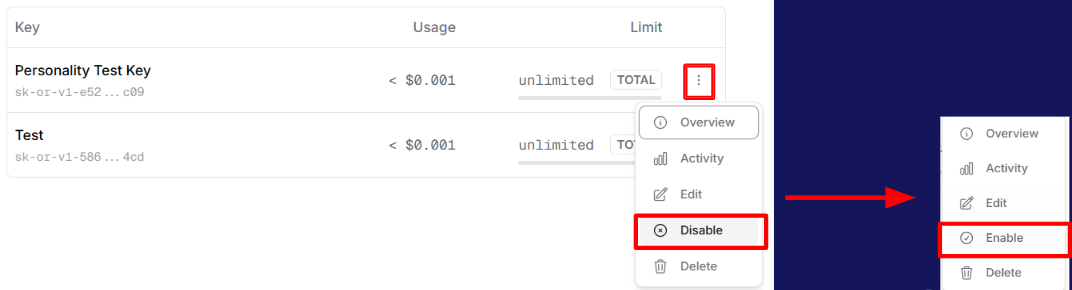
If you already committed a real key, revoke it immediately from OpenRouter Keys and create a replacement. Do not commit the replacement to this public project.

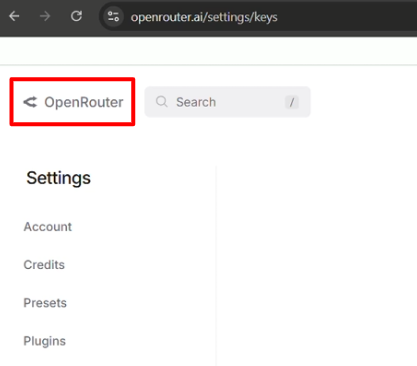
OpenRouter API key settings

🎉 Congratulations! You have built an AI-powered app, live on the internet.

If you get stuck, compare with the full code example.

Bonus day completed! You have finished the whole 6-in-6 course. 🚀

This lesson has a task checklist in the portal, where you tick off each step and get feedback on the code you write. Do this lesson free.

Reading it is step one. Doing it is the point.

Everything above is the full teaching content, free to read. The same lessons in Sigmo add 5 quizzes that mark themselves, 4 hands-on checklists, and an AI coding buddy that answers questions about the exact line you are stuck on. No card needed.

Do this course free

You just read it. Now go build it.

The free trial puts you inside Sigmo, the learning portal our students use every day, with the quizzes, the checklists and an AI buddy on every lesson. No card needed.